For this task we were expected to work in pairs to create two halves of a tray, assuring that they are aligned almost perfectly.
Step 1: Cutting the material


In order to hammer out the curves and edges of the tray we used circular metal templates, as well as cut out some with scrap timber.


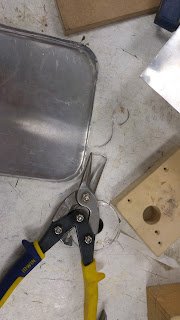


The dimensions for our tray were 180mm x 180mm with a 10mm excess for the lip of the tray. These were all marked on by scribes and cut out using the guillotine machine.
Step 2: Cutting out templates
In order to hammer out the curves and edges of the tray we used circular metal templates, as well as cut out some with scrap timber.


Step 3: Creating the lip
With the material and templates ready it was time to start hammering out of the curves and edges we marked. It was vital to be precise with the hammering to assure the material shaped properly, however we found that with the curves in particular that the material stretched out a bit.


Step 4: Refinement
At this point I was just trying to clean things up, shave any excess material, smoothen out edges, and so forth.


Comments
Post a Comment